Office 365 is in the middle of a major upgrade. Many small business subscribers have already been upgraded and Microsoft intends to have all subscribers upgraded in the next few months. Hosted Exchange mailboxes are being upgraded to new servers running Exchange 2013; it doesn’t change the day-to-day experience of using Outlook but there are some improvements in webmail that are worth knowing about.
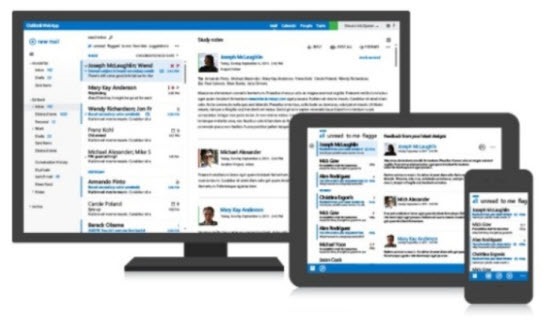
Outlook Web App (OWA), the webmail component of Office 365’s hosted Exchange mailboxes, got a lot of attention from the Exchange 2013 designers. It resembles Outlook 2013 visually, with a simplified interface, lots of white space, and flat controls. For the first time, the experience is almost identical in all of the major browsers – Internet Explorer, Chrome, Firefox, and Safari. It’s customizable and efficient; OWA doesn’t have all the options available from the Outlook ribbon but it has the basic and important features.
The interface is designed to scale to different size screens, so it is usable whether you view it on a computer, tablet, or phone.

![]()
Outlook Web App now supports many things that were previously only available in the desktop Outlook program. The big one for many offices is that OWA now displays shared calendars, which have not been visible until now without a full copy of Outlook. OWA fully supports drag-and-drop mail sorting and right-click menus.
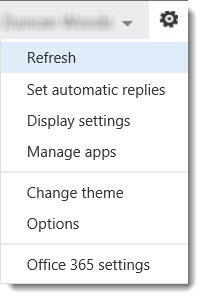
Out Of Office messages Click on the gear in the upper right corner and set up Out Of Office messages (“Set automatic replies”). That can also be done from Outlook but OWA is simple and reliable, and the message can be adjusted on the fly from any computer.
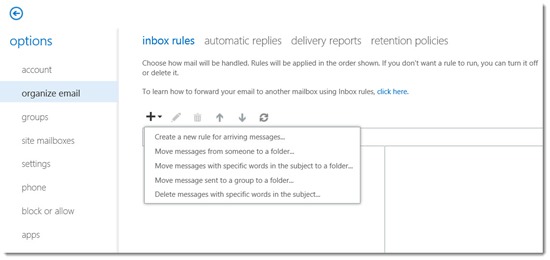
Rules OWA has also become the most reliable way to set up rules for handling mail, which in the past involved confusing decisions about local rules and server rules. When you create rules in OWA, they are stored on the server and fire reliably regardless of whether Outlook is running.
From the gear in the upper right corner, click on Options / Organize Email. Setting up a rule involves the same choices that have been in Outlook for years.
It’s easy to set up a rule that forwards all incoming messages to another address. The forwarding address can be chosen from anyone in the business address book or Contacts folders – or an address can just be typed into the window.
[NOTE: If you set up mail forwarding with a rule, remember that the rule should actually be redirecting mail, not forwarding it. Redirected mail appears unchanged in the destination mailbox, as if it came from the original sender. Forwarded mail has FW: in the subject line and appears to have been sent from the forwarding mailbox. Here’s some background about that.]
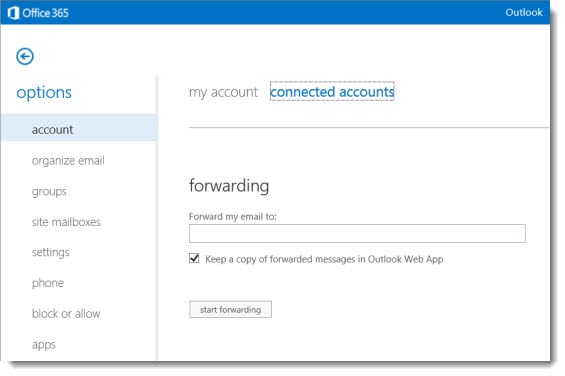
Mail forwarding It turns out, though, that it’s even easier than that to forward mail from your Office 365 account after it has been upgraded.
Click on the gear in the upper right corner and click on Options / Account / Connected Accounts. You’ll find Forwarding by scrolling down a bit. Fill in an address. Done! All messages are now being forwarded. (They’re actually being redirected. They show up unchanged, just as they were sent by the original sender.)
Many small business Office 365 subscriptions have already been upgraded. The rest will be upgraded in the next few months. After the upgrade, take advantage of the improved webmail – it might be a better place than Outlook to do some mail chores. (And if you’re not an Office 365 subscriber, drop me a note and let’s talk about it!)


Trackbacks/Pingbacks