Upgraded a computer to Windows 10? Bought a new computer? This is the guide you need – tips and tricks for your Windows 10 computer to smooth out its rough edges and make the most of its new features.
I’ve assembled these suggestions based on feedback from dozens of small business users in the last six months. If you want to do anything differently, feel free! I won’t mind.
This is my checklist when I’m setting up Windows 10:
1) Customize or replace the Start menu
2) Make Edge disappear and choose a better web browser
3) Set Outlook as the default mail client
4) Set Acrobat or Acrobat Reader as the default program for PDFs
6) Turn on “Find My Device” on laptops
7) Use Task View on laptops with a touch screen
8) Customize the File Explorer navigation pane
11) Turn off uploads to online computers
12) Change privacy settings to match your preferences
1) Customize or replace the Start menu
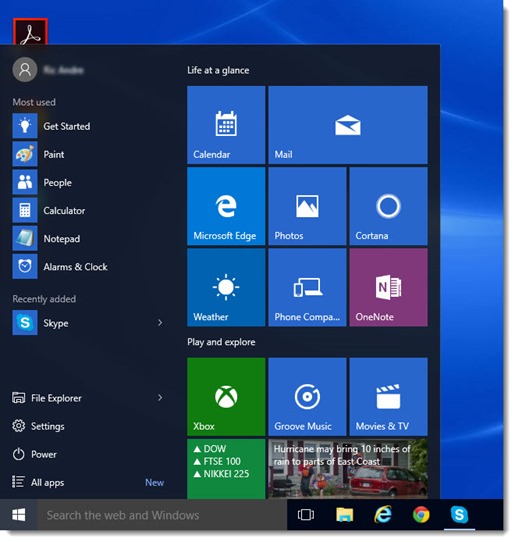
The Windows 8 Start screen was hated by almost everyone, with unintuitive off-screen elements and oversized tiles that were ill suited to desktop computer users. Microsoft believes the Windows 10 Start menu successfully blends the best elements of the traditional Windows 7 Start menu and the Windows 8 Start screen. There’s a left column of text entries for programs and controls for basic functions like Power and Settings. On the right are Windows 8-style tiles that can be configured as another way to get to frequently used programs, with extra information from programs that can make “Live Tiles” flip around with updates and notifications – weather, news, the first sentence of new email messages, etc.
Everyone will react differently. We are far past the days when one size fits all, in technology or anything else. Some people will find the new Start menu to be a thing of beauty, practical and helpful and well designed.
Personally, I don’t like it very much. Let’s see – ah, yes, “cluttered mess,” that was the term I used. After the last few years with Windows 8, I am heartily sick of live tiles flipping and flapping around; I want my Start menu to stay quiet. I got used to the Windows 8 Start screen but to be honest, I seldom focused on it after the first few months.
The good news is that you have lots of options to make the Windows 10 Start menu anything you want. The bad news is that it’s up to you to change it. The picture above is more or less going to be your first experience with Windows 10 and I don’t want you to get hung up on it if you don’t like it.
You’ll find instructions here about how to customize the Windows 10 menu to your liking, or even replace the menu with Start10, a Windows 7 look-alike – highly recommended for Windows 7 users who prefer not to learn anything new.
2) Make Edge disappear and choose a better web browser
After you upgrade, Microsoft will have changed your default web browser to its new Edge browser, regardless of what you were using before. The Edge web browser is built on a solid foundation but it’s not finished and it’s still not ready to be used as your full-time browser. In its current state, Edge is missing a long list of features that make it anywhere from inconvenient to effectively unusable, depending on which ones you care about.
Edge cannot be uninstalled, but you can switch to another browser. You’ll have the best experience if you first bring Internet Explorer into view so you have easy access to it. Then if you prefer, download Chrome and switch to make it your default browser. Use Internet Explorer or Chrome until Edge is ready.
To use Internet Explorer or Chrome full time, click on Start, type in Default Programs, and click on Default Programs (Desktop App) when it appears at the top.
Your goal is the Default Programs section of Control Panel. There is also a Defaults section in the new Windows 10 Settings screen that’s separate from Control Panel. If you wind up there, click on “Set defaults by app.”
Click on Set your default programs.
Highlight Internet Explorer or Google Chrome and click on Set this program as default. Internet Explorer or Chrome will now be the browser that opens when you click on links in any program.
You’ll find more details and screen shots in this article.
3) Set Outlook as the default mail client
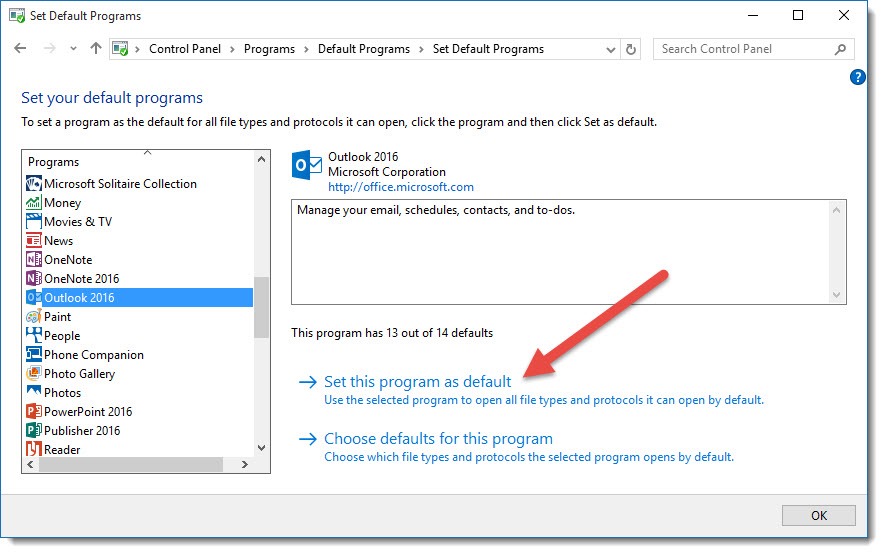
This tip is only for Outlook users. You want Outlook to be responsible for everything dealing with mail, right? By default, Windows 10 does not give Outlook control of every mail task, so at some point an unexpected thing happens when you’re expecting Outlook to pop up with, say, a new email message.
You want to set Outlook as the default program for everything it knows how to handle.
Click on Start, type in Default Programs, and click on Default Programs (Desktop App) when it appears at the top.
Your goal is the Default Programs section of Control Panel, shown above. There is also a Defaults section in the new Windows 10 Settings screen that’s separate from Control Panel. If you wind up there, click on “Set defaults by app.”
Click on Set default programs. Highlight Outlook 2013 or Outlook 2016 and click on Set this program as default.
There are more details in this article about a similar problem in Windows 8.
4) Set Acrobat or Acrobat Reader as the default program for PDFs
On your Windows 7 or 8 computer, when you click on a PDF – the universal office file format – it opens in Adobe Acrobat, or Acrobat Reader, or Foxit Reader, or whatever program you have installed for PDFs. You’re accustomed to that. It makes you happy.
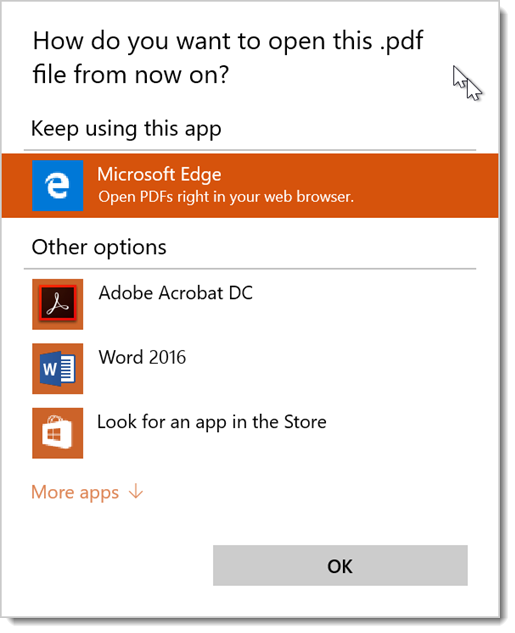
After you upgrade to Windows 10, when you click on a PDF, it opens in the Edge Internet browser. This is very wrong.
It’s not as if Edge is particularly good at displaying PDFs. It has a bare minimum of controls in the upper right to zoom in and out, print, and save the PDF. It doesn’t offer any way to send the PDF as an email attachment with Outlook because the Share command in Edge doesn’t include Outlook.
Most of you use Adobe Acrobat or Adobe Acrobat Reader to open PDFs. Your goal is to set one of those programs (or your favorite PDF program) as the default program for PDFs.
Click on Start, type in Default Programs, and click on Default Programs (Desktop App) when it appears at the top.
Your goal is the Default Programs section of Control Panel. There is also a Defaults section in the new Windows 10 Settings screen that’s separate from Control Panel. If you wind up there, click on “Set defaults by app.”
Click on Associate a file type or protocol with a program. Scroll down the list and highlight the line for the .PDF extension. Click the Change program button and choose your preferred program from the list.
There are more details and screen shots in this article.
5) Configure Cortana
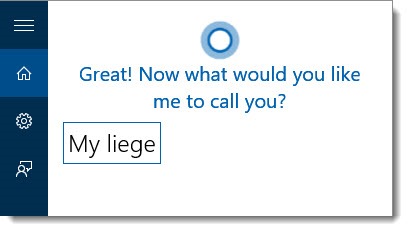
The search box next to the Start button in the lower left can be used to search for anything on your computer or online. It can also be used to start Cortana, Microsoft’s answer to Siri, which can add a personal touch to searches and can include things that you’ve told it you’re interested in.
Cortana has the potential to be one of the most useful new features in Windows 10. Microsoft is hoping to expand Cortana to Android phones and iPhones in the future, in the hope that it will become second nature to depend on her. (Like Siri, it’s easy to personalize Cortana.)
There is a special section in Settings / Privacy about Cortana, because she has to know a lot about you in order to be helpful. Here’s a description of Cortana: “In order to work, Cortana logs your voice (to process what you’re saying), location (to give you location-specific answers), your writing (to answer questions), your contacts (so you can reference them), calendar events (so it can create, delete, or give information about your upcoming appointments), and more.”
Cortana is turned off by default. You’ll be asked to configure Cortana when you click the search box on the taskbar, or when you click the Cortana tile on the Start menu. You can leave Cortana turned off if you’re worried about privacy issues.
If you want to try Cortana – and you should – the setup process is straightforward. You can find a walkthrough of all the options here. You can configure each category (Eat & Drink, Travel, etc.), give Cortana permission to check your calendar, train her to respond to your voice, and more.
6) Turn on “Find My Device” on laptop
You can have your laptop send its location every few hours to Microsoft. If your laptop is lost or stolen, you can view the last location where it was online. “Find My Device” is not activated by default, and it only works if you log into your computer with a Microsoft account. If so, then toggle the switch to turn it on. At the moment all you can do is look at the laptop’s last online location on a map – you can’t have it make a sound, or lock itself, or erase data, for example – but knowing the general location of your laptop might be valuable if you’re not sure whether you left it at home or at your last stop.
Go to Settings / Update and Security / Find My Device. Click on Change and toggle the switch to start saving your device’s location periodically.
If your laptop is lost or stolen, go to https://account.microsoft.com/devices. Log in with the Microsoft account used on the missing device. Choose the device and click on Find My Device to display a map with the last online location.
There are more details and screen shots in this article.
7) Use Task View on laptops with a touch screen
![]()
Once you’ve been working for a while, reach out and swipe in from the left side of the screen. You’re looking at the new Task View. It’s a grown-up version of Alt-Tab for switching between programs. With a touchscreen, switching between programs becomes a thing of beauty – swipe left and tap on the thumbnail of the program you want to use.
Task View shows all open applications, neatly labeled, with a thumbnail view of each window. Unlike Alt-Tab, Task View stays onscreen after you lift your hand from the keyboard/screen until you choose one of the windows. It is the easiest way to switch from one program to another, especially if you have a touchscreen and swipe from the left.
There are several other ways to bring up Task View. You can click on the mysterious new icon on the taskbar next to the Cortana search bar, shown above. You can also hold the Windows key down and hit Tab, or swipe up on a modern taskpad with three fingers. Swiping in from the left on a touchscreen is easier and faster.
There is more information about Task View features and some screen shots in this article.
8) Customize the File Explorer navigation pane
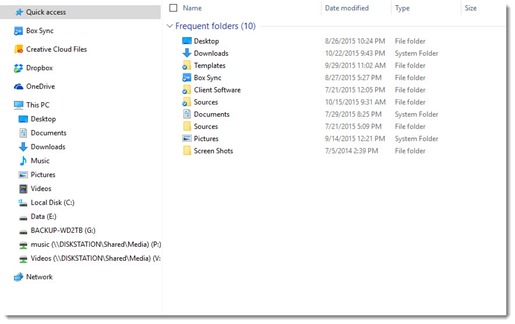
When you open File Explorer in Windows 10, you see many things designed to make life simpler. There are so many, in fact, that the navigation pane on the left has become cluttered and confusing, exactly the opposite of what you need. You can remove some of the distracting items with a few clicks – libraries, multimedia devices, frequently used files, and recently used files. All the info you need is in this article about how to remove the “features” that don’t matter to you, to make File Explorer simpler and make you more productive.
9) Turn on file extensions

The strangest default setting in Windows has been the same for several versions: for some reason, file extensions are kept hidden. You have to play a guessing game to decide if a file is a Word .DOCX file or an Excel .XLSX file or an Acrobat .PDF file.
It’s easy to turn on file extensions in Windows 10: open File Explorer, click on View, and check the box for File Extensions. It helps so much when you’re browsing through files!
10) Turn on File History
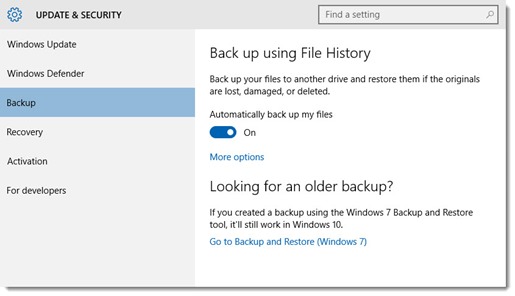
If you’re using a desktop computer, connect an external hard drive (buy a 2Tb drive if you don’t have one), then click on Settings / Update & Security and turn on File History. File History backs up all the files in your user folder automatically and continuously, with an easy interface to recover deleted files or roll back to earlier versions. It provides extra protection even if you have another backup program.
File History now allows you to save those backups to a shared network folder instead of an external hard drive, if you’re savvy enough to set that up.
If you’re using a laptop, File History is harder to use, because it only runs when the external hard drive is connected. At least set up Bruceb Cloud Backup or another online backup service on a laptop, or make sure that all your files are stored in an online service like Dropbox, Box, or OneDrive.
11) Turn off uploads to online computers
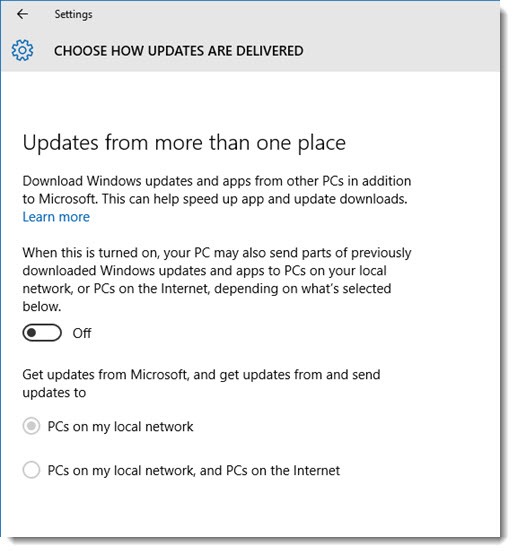
By default, Microsoft turns on a “feature” that uploads Windows 10 setup files and patches from your computer to other computers on the Internet. Microsoft has no business using your upstream bandwidth without your knowledge for something that does not benefit you. Go to Start / Settings / Update & Security / Windows Update and select Advanced Options / Choose how updates are delivered. Use the toggle to turn Delivery Optimization off. There are more details in the second half of this article.
12) Change privacy settings to match your preferences

When you set up Windows 10, you almost certainly chose “Express Settings.” Everyone does. Microsoft deliberately sets the option to “customize settings” off to the side in small print.
I’ve read deeply about privacy in Windows 10 and the result is that I haven’t changed a single option. If you’re at peace with the modern world, you don’t have to do anything. This explanation is for people who are sensitive to privacy issues.
There are many options covered by the “Express Settings” button. For most people, those settings make Windows work the way they expect. Information flows freely back and forth between Microsoft and your computer. Some of it is personal information synced with your Microsoft account – your favorites and browsing history in Internet Explorer, for example. Some of it is anonymous – the web addresses you’re browsing are run through a service named “SmartScreen” to prevent malicious content from getting onto your computer, for example. Another example: Microsoft collects anonymous diagnostic information about program crashes from millions of computers so it can make Windows better overall. And yes, some information about you is used by Microsoft to choose the ads that are displayed on some web pages.
Some people want to reduce the amount of information transmitted to Microsoft as a way of safeguarding their privacy as much as possible in the modern world. There are many places to change settings that are arguably privacy related; many (but not all) are in Settings / Privacy. It’s not as simple as going in and turning everything off, though. You’ll wind up so secure that some things won’t work.
Let me give you three places to start your research: Microsoft’s explanation of how it handles your data and why each type of data is collected; a calm and thorough walkthrough of the specific options; and a description of how to lock down Windows 10 for maximum privacy.
If you make those changes, you’ll find Windows 10 is a relaxing and friendly place to work. Enjoy your upgraded system!


Trackbacks/Pingbacks