Windows 8 includes a feature that lets you recover older versions of documents or photos easily and flexibly. File History is an improved version of “Previous Versions,” a feature of Windows 7 and Vista that almost no one ever discovered in its hiding place on the Properties menu of individual files. Apple took the same feature, added an outer space background for some reason, and offered it up as “Time Machine.” Now Microsoft is reclaiming the idea and making it more visible in Windows.
In Windows 8, File History is a no-brainer, offering automatic backups of the files that matter most to you with no fuss.
For some reason, though, File History is not enabled by default. You have to go and turn it on, something that takes only a couple of clicks.
TURNING ON FILE HISTORY
File History can store backups on an external hard drive or on a shared folder on a network. If you are over 40 and the idea of understanding what a shared folder is leaves you breathless, an external hard drive is easiest to set up.
Plug in an external hard drive or set up a network share for backups.
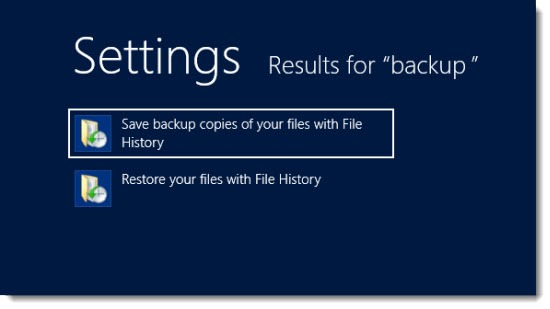
Go to the Start screen, type Backup and click on “Settings” on the right. In the search results (pictured above), click on “Save backup copies of your files with File History.” (You can also get there from Control Panel on the desktop, of course.)
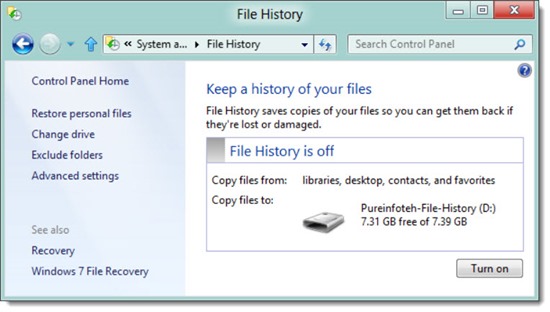
File History will choose a default location for the backups. You can change it easily – if it chooses the external drive but you want the backups to go to a network location, for example, click on “Select drive.”
Click “Turn on” in the lower right.
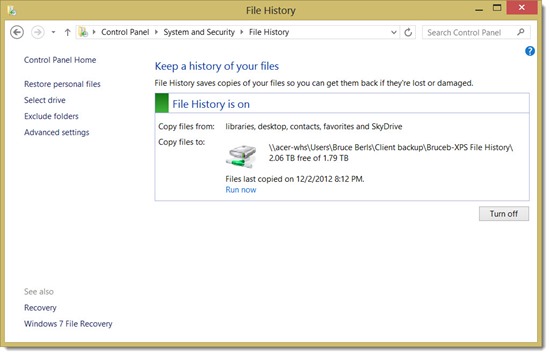
You’re done. It’s working. It will look something like this.
WHAT IS BACKED UP BY FILE HISTORY?
File History does not do a complete backup of your PC. That’s less necessary than before because of other improved tools in Windows 8 to refresh and reset the computer.
File History backs up:
- Everything in your libraries – the default Windows 8 libraries for Documents, Pictures, Music and Videos, plus any new libraries you may have created
- Your desktop
- Internet Explorer favorites
- Skydrive folders, if you’ve installed the Skydrive desktop app
You can’t add folders from other locations to File History. You can, however, add folders from other locations to a Windows 8 library, either one of the existing ones or a new one, and the new locations will then be backed up.
If more than one person logs onto your computer, note that File History is set up per user. When you set it up for yourself, it does not automatically begin protecting another user with a separate login.
File History does not back up files located on network shares, even if they are included in a Windows 8 library. That’s one of the reasons this is meant for individuals and might not be right for businesses, especially larger businesses, where network shares and redirected folders are used frequently. There are security issues for enterprises, too, since File History does not encrypt backed up files or enforce file permissions from the original location.
HOW OFTEN DOES FILE HISTORY BACK UP FILES?
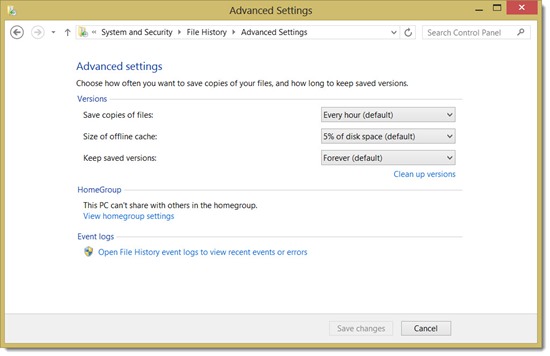
By default, File History backs up all of those files every hour. Each version of a file that changes is kept forever.
As you might imagine, the backups could start to take up a lot of storage space, although you might be surprised how efficient they are at using space. File History will alert you if storage space gets tight and give you options to move the backups to a bigger space or delete old versions.
File History continues to work if the storage location is not available. If you are out of the office working on your laptop, for example, File History will continue to store versions of files you work on. When you get back to the office and plug in the external backup drive, the new versions will be added to the other backups.
RECOVERING FILES
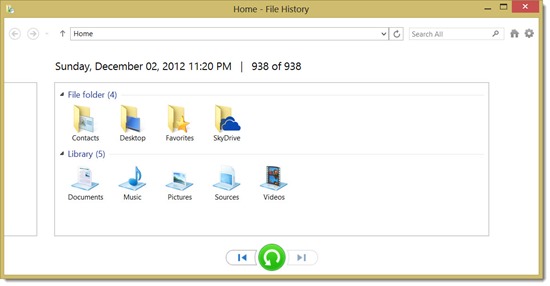
You can open up the main File History interface and restore files from there by clicking on “Restore personal files.” You’ll start in a view of all the backed up locations. As in all the File History restore screens, the date and time is at the top; the arrows at the bottom let you go back in time to earlier versions of the folders.
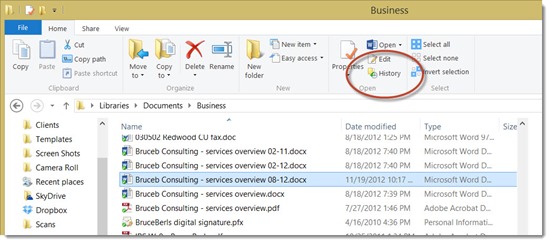
It’s easier to open File Explorer and navigate to a folder or individual file, then click on the History button in the new ribbon interface.
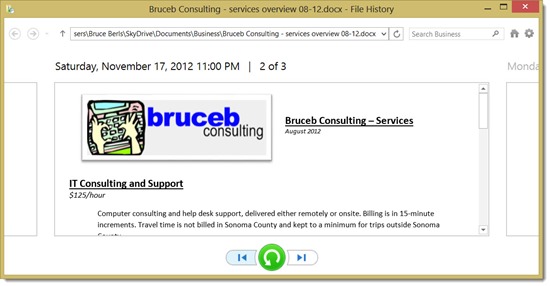
When you get to an individual file, you’ll see the number of versions and a preview window displaying each version, with arrows to zoom back and forth among all the different versions. When you find the one you want, click the arrow at the bottom to restore it to its original location.
Anyone with an individual Windows 8 computer should be taking advantage of File History. Track it down and get some extra protection for your files!

Trackbacks/Pingbacks