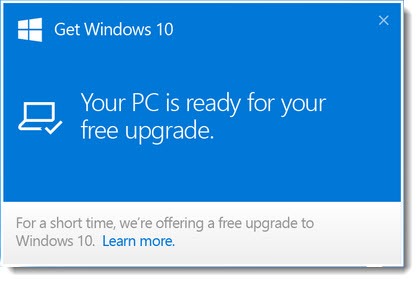
If you don’t intend to upgrade your Windows 7 or 8 computer to Windows 10, these instructions will help you remove the Windows 10 upgrade notices.
Most of you don’t have to do this! The notices are harmless and easy to ignore. Getting rid of them requires several annoying steps. This advice is only for people who obsess over details and want complete control over their computer.
Background
Microsoft is pushing the Windows 10 upgrade aggressively. The upgrade icon in the lower right corner of the taskbar is only the beginning. A couple of weeks ago it became clear that Microsoft has been downloading gigabytes of install files regardless of whether you’ve expressed any interest in the upgrade. On some computers, screens appear promoting the upgrade when the system is restarted, or a notice appears whenever Internet Explorer is launched, or it’s listed in Windows Update as an “Optional” update.
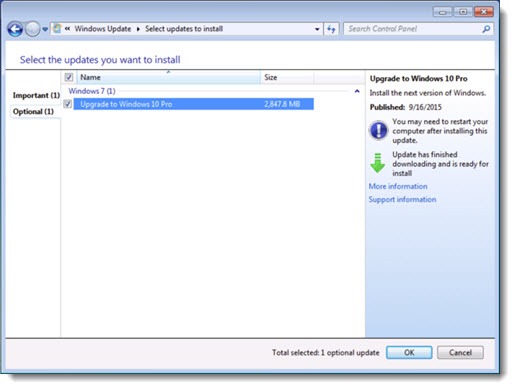
Last week a number of computers were upgraded to Windows 10 when Microsoft checked the box on the “optional” update by default, even though the owners of the computer had not intended to upgrade. Microsoft quickly stepped up to say, “Oops! Our bad. Terrible mistake. We intended only to keep launching barrages of annoying notices that will wear people down. We’ll go back to that now.”
At the least, many of you have the Windows 10 upgrade icon in your taskbar. It’s harmless but annoying, the little flaw that you can’t look away from once you notice it.
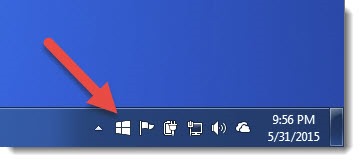
(Not all computers have the upgrade icon. The upgrade is not supposed to be offered automatically to domain-joined computers, computers running Enterprise versions of Windows, and some others.)
I think most people should wait for the Windows 10 service pack in November before upgrading. If that’s your plan, live with the icon and the notices and keep postponing for a few more weeks. It’s not a big problem.
But I’m advising many people to skip the Windows 10 upgrade entirely. If you have a business computer running Windows 7 that’s more than four years old, for example, I think on balance you should leave it alone. If you agree, you may want to remove the distracting notices. Here are the steps to do that.
To be clear: this will not prevent you from upgrading a computer to Windows 10 in the future. This suppresses the upgrade notices, nothing more. A qualifying computer can be upgraded to Windows 10 from this page any time.
How to remove the Windows 10 upgrade notices
There are six steps to the process.
1) Turn off Automatic Updates temporarily.
2) Uninstall Windows update KB3035583.
3) Uninstall KB2952664 (Windows 7) or KB2976978 (Windows 8), if present.
4) Restart your computer.
5) Manually check for updates and hide KB3035583, KB2952664 (Windows 7) and KB2976978 (Windows 8).
6) Turn on Automatic Updates.
Please accept my apologies on Microsoft’s behalf. This is wrong in so many ways.
Here are the details.
1) Turn off Automatic Updates temporarily
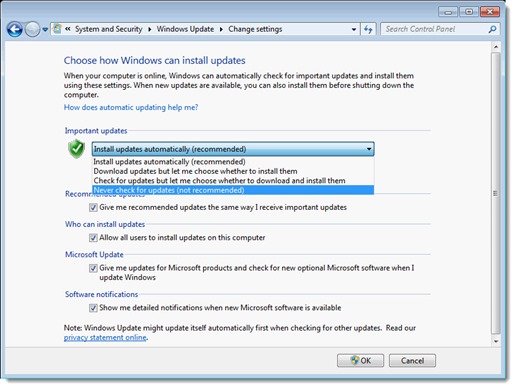
Go to Control Panel / System and Security / Turn automatic updating on or off. Set the dropdown menu to “Never check for updates.”
2) Uninstall Windows update KB3035583
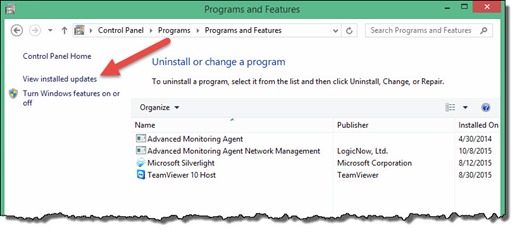
Go to Control Panel / Uninstall a program / View installed updates.
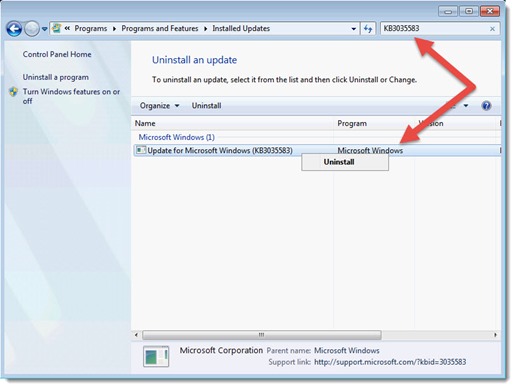
Type “KB3035583” in the search bar in the upper right.
Right-click on the update and click on “Uninstall.”
Click on “Restart Later” when it appears.
3) Uninstall KB2952664 (Windows 7) or KB2976978 (Windows 8), if present
Repeat step 2 and search for KB2952664 (Windows 7) or KB2976978 (Windows 8). Uninstall each update if it is present on your computer.
These are difficult to uninstall on some computers. Don’t obsess over them. The important one is KB3035583. Remember, we’re not fixing some terrible problem, we’re just dealing with an annoyance.
4) Restart your computer
Important! You must restart the computer after uninstalling the updates.
5) Manually check for updates and hide KB3035583, KB2952664 (Windows 7) and KB2976978 (Windows 8)
After the computer restarts, go to Control Panel / System and Security / Windows Update.
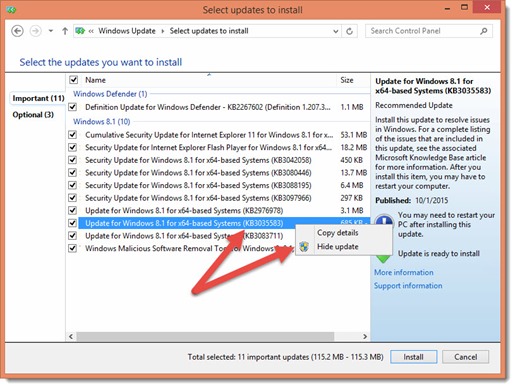
Click on “Check for updates.”
The updates you removed should appear in the list to be installed again. Right-click on KB3035583, KB2952664 (Windows 7) and KB2976978 (Windows 8) and click on “Hide update.”
6) Turn on Automatic Updates
Go to Control Panel / System and Security / Turn automatic updating on or off. Set the dropdown menu to “Install updates automatically.”
All it took was thirty or forty minutes and the Windows 10 icon should be gone from your taskbar. Good work!
I’m the teensiest bit irritable with Microsoft these days.
Although this should be a permanent fix, don’t count on it. Microsoft “re-issued” the core update KB3035583 in October and some people reported finding the upgrade notices starting up again, even though they had gone through this procedure.
Good luck! Let me know if you need help.

this page also removes fuss, thanks.
gotta reboot now. 🙂
This is a MAJOR blunder on the part of Microsoft. They will lose a lot of people. The future of windows looks bleak. Guess I’ll become a Linix guy from now on.
buh-bye Microsoft, you guys screwed up you came on too strong with Windows 10.
For what it’s worth, this utility claims to remove the upgrade notices without any fuss.